 Quick Navigation
 All projects
  Hardware
 Links
Links Top projects
Alan numitron clock
Clapclap 2313/1386
SNES Pi Webserver
USB Volume/USB toys
Smokey amp
Laser cutter
WordClock
ardReveil v3
SNES Arcade cabinet
Game boy projects
cameleon
Home Presence Detector
 GitHub
AlanFromJapan
 Contact me
 Who's Alan?
Akizukidenshi
Elec-lab
Rand Nerd Tut
EEVblog
SpritesMods
AvrFreaks
Gameboy Dev
FLOZz' blog
Switch-science
Sparkfun
Suzusho
Datasheet Lib
Reddit Elec
Ermicro
Carnet du maker (fr)
dust counter
Last update: Tue Feb 17 20:52:01 2026
 I found these 5USD dust sensor (counter is a big word in fact) on eBay and tried it. Since I do woodworking as a second hobby, having a sensor to make sure I'm now brownlungig myself into pneumonia. So one stone two birds.
Presentation
Principle
That cheap module has a IR led and sensor that is calibrated to return a voltage that is function of the volume of dust in the air. I put a small led bar in front since I'm not interrested by the value, an indication of the air quality is enough for me.Points of interrest
Implementation
Bill of materials
GP2Y1010AU0F Dust Sensor how to use
PinoutOn mine, the connector wire colors are (looking at the plug on the sensor, wires bottom, left to right):
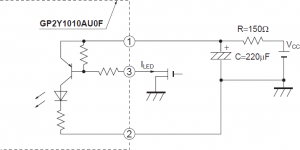
The dust sensor wiring schema from the doc
Voltage to dust density approximation

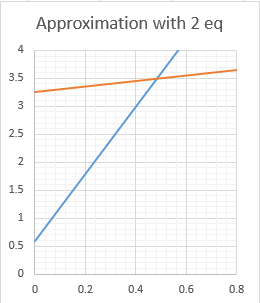
Datasheet vs. homemade approximation
I decided to use 2 linear approximations, using 5V:
/* Takes the voltage (in V) read and return the dust density based on the graph provided in the Datasheet
 */
float voltage2DustDensity (float pVoltage) {
  if (pVoltage <= 0.6) {
    return 0;
  }
  if (pVoltage <= 3.4) {
    /*
     linear regression calulated from key values at (v=0.6 dust=0) and (v=3 dust=0.4)
     x = (y  - b) / a
    */
    return (pVoltage - 0.6)/6.0;
  }

  /*
   voltage > 3.4 same with [0.5;3.5] and [0.8;3.65]
   x = (y  - b) / a
   */
  return (pVoltage - 3.25)/0.5;
}
Schematics
Follow the schematic from the datasheet for the Dust sensor. The board is a WordClock board because it was proper in term of size. The Led bar is linked via a bunch of 1k ohm resistors to pins 27 to 15 (arduino A4 to 9), and the Dust sensor pin connected to A5 for reading and 8 (arduino) for driving the LED.Source code
It's an arduino script because I was too lazy to write it properly in C in Atmel Studio. Code is here on GitHub.Pictures
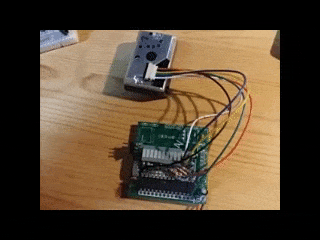
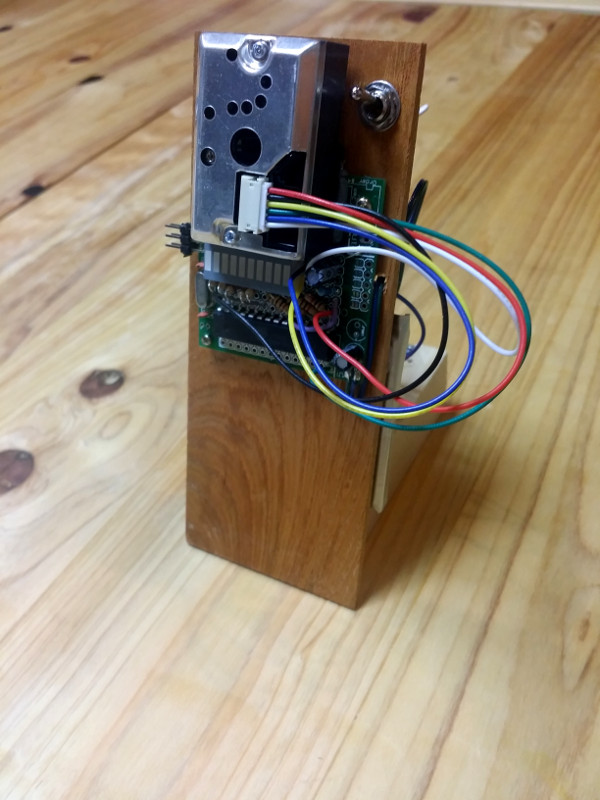
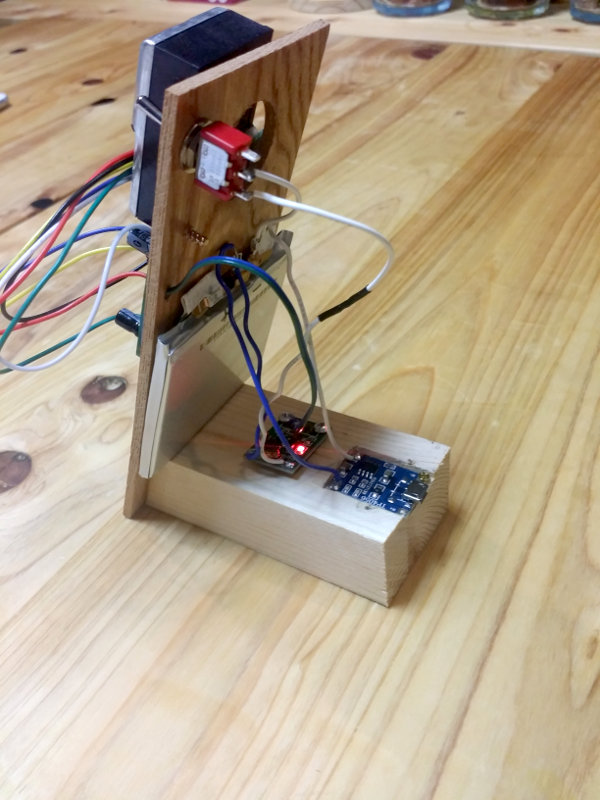
Mounted on its holder, backk has a scavended Liion battery, a Liion charger and a boost converter to 5v
Links
Helpful sources
People who had problem with this LCD:Inspiration
electrogeek.tokyo ~ Formerly known as Kalshagar.wikispaces.com and electrogeek.cc (AlanFromJapan [2009 - 2026])